Using Food Storage Buckets And Containers
Food Grade Food Storage Buckets
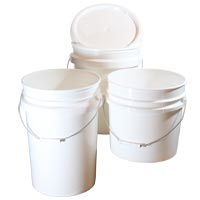
There is a lot of misinformation out there about plastic buckets. Most of the controversy rages over whether a bucket is food grade or not. Most plastic containers, usually on the bottom, will have a number inside a small triangle. All the buckets I have ever seen have a #2. This number doesn't mean that it's food grade as many people suppose. But rather it tells what kind of plastic the bucket is made of. The #2 means it is made from HDPE plastic. Most of these buckets are food grade but there are times when they are not.
Sometimes the bucket has a dye added to the plastic that is not food grade This alone will prevent the FDA from approving it as food grade. And sometimes the bucket manufacturer uses recycled HDPE. These buckets also are not food grade. And lastly, when something is put in the bucket that is a nonfood type product such as paint, chemicals, and such things, this also makes them so they are no longer food grade. HDPE plastic is slightly porous and will absorb these chemicals which will gradually leach back into any food you place in the bucket later.
So, how do you find buckets that are safe for you to use for the foods you want to pack yourself? If you are going to buy them new, ask the company who is selling them. If you get used buckets, only use buckets you know have already been used to store food and haven't been used for anything else. You can find these at bakeries, ice cream manufacturers and parlors, large restaurants or kitchens, or food processing plants.
Lots of times the people who get these buckets, hack up the lids and make them unusable. If this is the case, you can get lids from us for a small fee if you can't locate used ones. You want to get lids that will seal air tight. This is especially important if you are not planning on using mylar bags. If the lid won't make an airtight seal, you can go to a lot of trouble removing the oxygen from your goods just to have the air circulate back in through the faulty lid or through the plastic bucket as well since plastic can allow oxygen to penetrate it over time.
Sealing the Lids

I used to pound them down with my hands but I didn't always get the lids all the way down doing it this way, not to mention what it was doing to the palms of my hands. Using a 2X4 and a hammer makes this job a snap. Lay the 2X4 across the top of the lid. Give the 2X4 a firm blow with the hammer. This part of the lid should pop down. Rotate the 2X4 4 or 5 inches and strike the 2X4 again, pushing this part of the lid down. Continue this operation until you have sealed the lid all the way around the bucket.
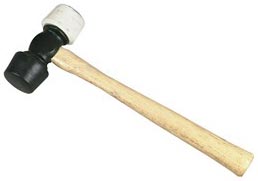
For even better results I would highly recommend using a rubber mallet. After situating the lid on top of the bucket, start with one area and after a good whack, work your way around the bucket until the lid is completely sealed. You'll know it is if you can pick it up and the bucket of food comes with it. Also, a properly placed lid will be very difficult to remove except with a lid remover. We also carry the Gamma Seal Lid which has an outer ring which snaps on the top of the bucket in the same way as a standard lid. Because this is a two-piece system though, I would recommend only using a rubber mallet for this and not the hammer approach as it is easier to break the outer ring with this method.
Our Food Storage Buckets

All of our food storage buckets are made from 100% new material (high-density polyethylene), made in the U.S.A., BPA Free, and meet NMFC, FDA and UFC requirements for direct food contact and food storage.
Oxygen Absorbers and Long-Term Food Storage
Packing Your Food with Oxygen Absorbers
Why Use Mylar Bags in Food Storage
Using Food Storage Buckets and Containers
How Much Food Fits in a Container
Oxygen Absorbers Recommended Amounts
Properly Storing Then Opening Your Food
Checking the Capacity of Oxygen Absorbers